Revoke tokens with SAFE Transaction Builder
Information required:
Vesting contract address
Vesting contract ABI (from Etherscan)
Wallet address(es) of the recipient(s) whose schedule you intend to revoke
CSV of vesting schedules status to determine the amount to withdraw once revoked (provided by VTVL)
Steps to revoke:
Navigate to your VTVL dashboard. Click on the "Contracts" tab and find the contract you wish to revoke. Click to copy the address of the vesting contract
Navigate to https://app.safe.global/welcome
Ensure you’re connected to the correct multi-sig that’s the admin of the vesting contract
In the left-hand sidebar, click ‘New transaction’
Then, click ‘Transaction Builder’
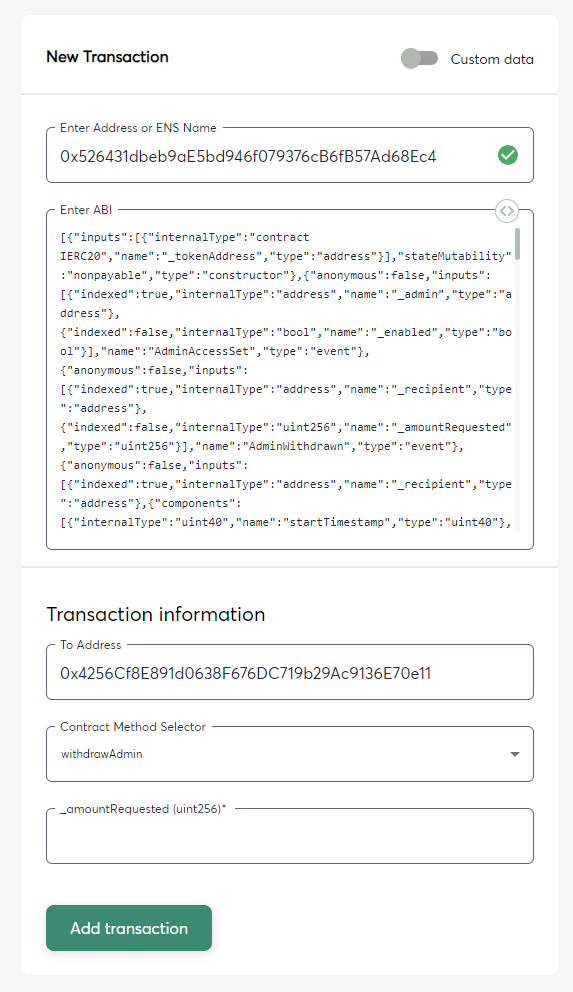
Enter the vesting contract address in the ‘Enter Address or ENS Name’ field
You should see the vesting contract ABI automatically populated
Under Contract Method Selector in the Transaction Information section, click the dropdown and select
revokeClaimfunction
Copy and paste the wallet address of the recipient whose schedule you’re going to revoke in the field below
Click ‘Add Transaction’ and then ‘Create Batch’
Once all the signers have signed off on this transaction, you can proceed to withdraw the locked tokens
Steps to withdraw locked tokens:
Note: The schedule must be successfully revoked before you can proceed to withdraw the locked tokens
Follow steps 4-7 in the Steps to get back into the transaction builder
Under Contract Method Selector in the Transaction Information section, click the dropdown and select
withdrawAdminfunctionEnter the address of the recipient whose schedule you’re going to revoke in the field below
Key in the amount of tokens you’d like to withdraw (refer to the CSV sheet VTVL has provided for an accurate amount)
The value entered in the amountRequested field should be the exact value that was given in the CSV file provided by VTVL.
Click ‘Add Transaction’ to add this to your transaction queue on Safe
Ensure all signers of the multi-sig approves the transaction for it to be executed
After the transaction has gone through, the withdrawn tokens should be inside your multi-sig
Last updated