Configure vesting schedules
How to create a vesting schedule
We recommend creating vesting schedules per recipient type and schedule parameters as this will ease management of the schedules. For example, let's say you have advisors with the same vesting parameters (start and end date, lock-up, and release frequency) and investors with different parameters. In this case you would want to setup two vesting schedules, one for advisors and the other for your investors.
Tip: You'll want to these details ready on-hand to speed up the process!
the start and end dates
cliff/lockup duration (if applicable)
percentage of tokens released after the cliff (lump sum) (if applicable)
frequency of vesting
number of tokens allocated per recipient
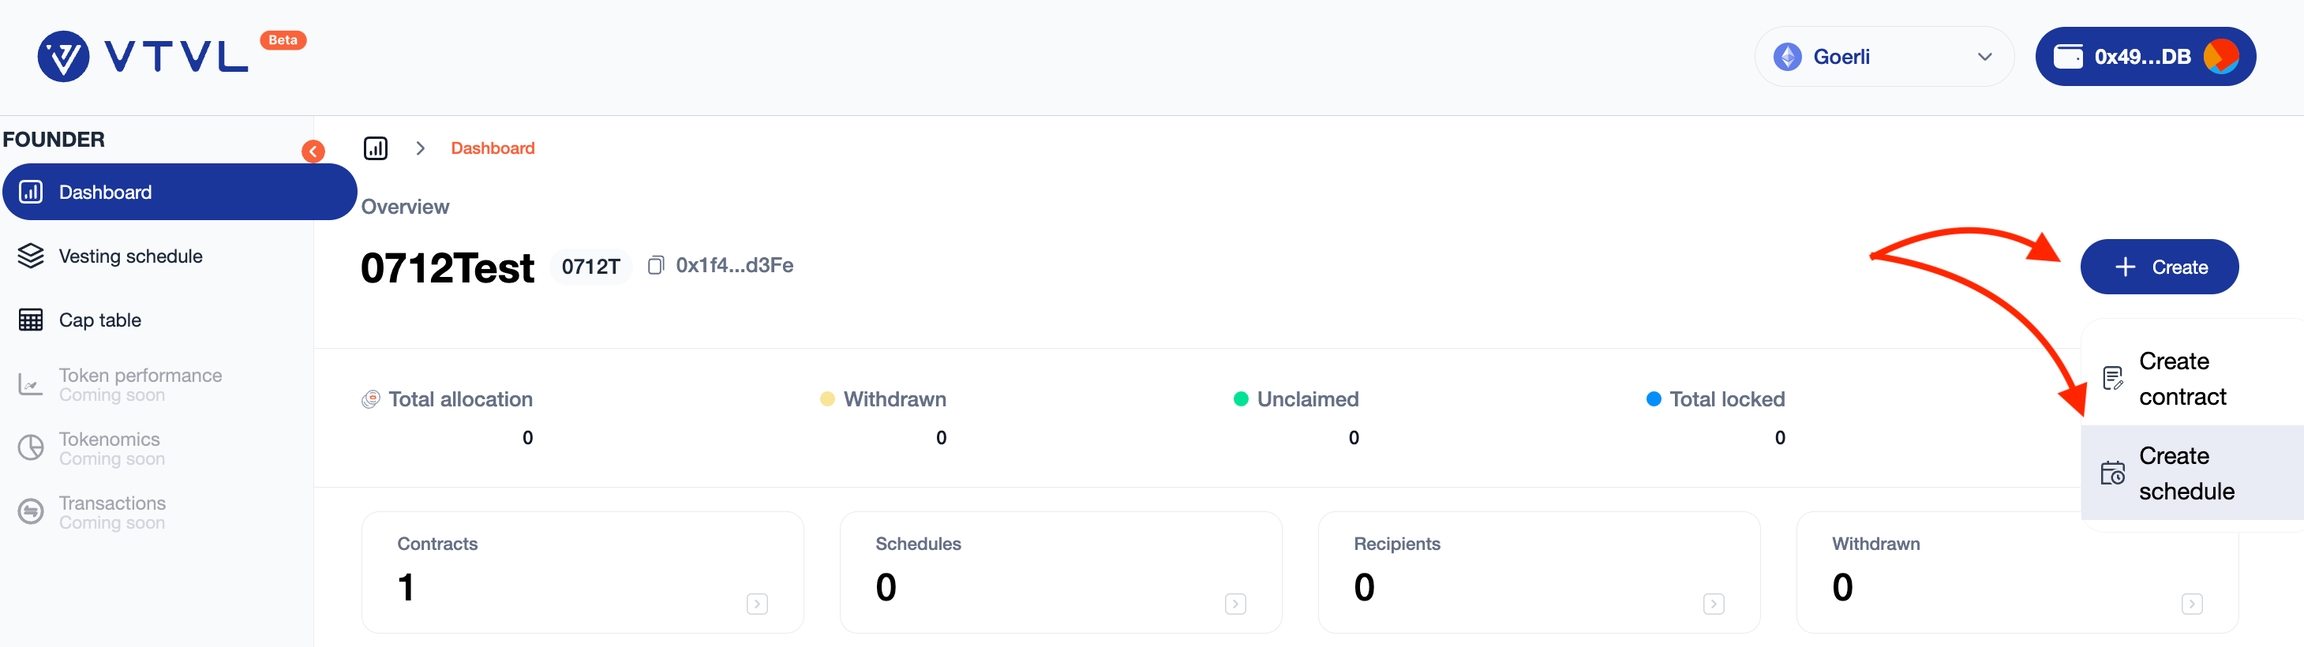
Step 1. After successfully deploying a contract, click on + Create and select Create schedule in the drop down.
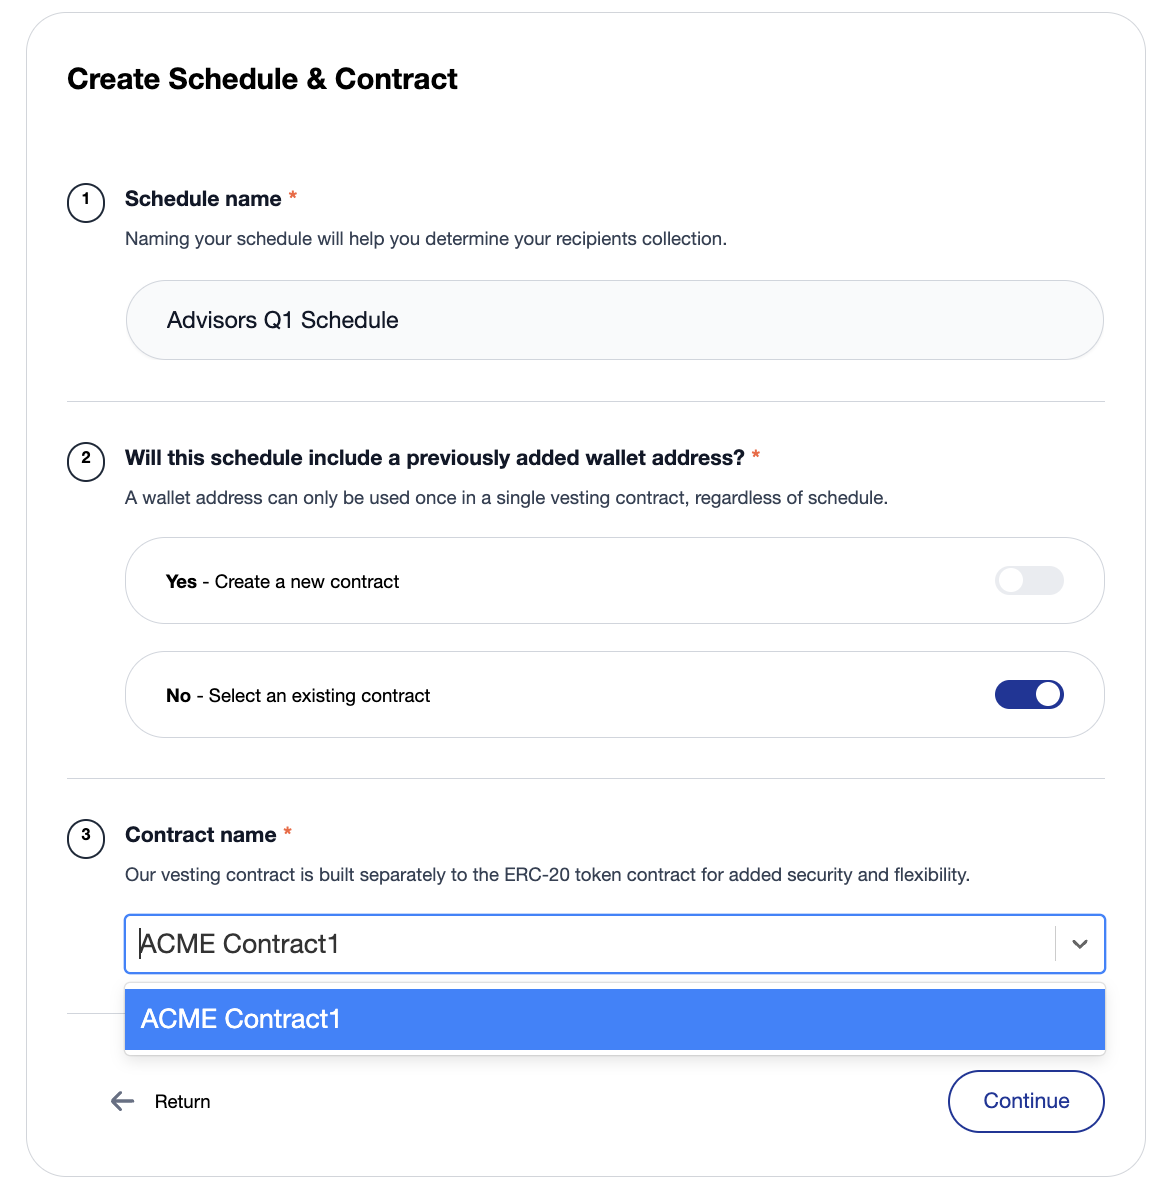
Step 2. Name the schedule.
Name your schedule so that it's easy for you to distinguish it amongst other schedules as the name is displayed in your dashboard, vesting schedule page, and cap table.
Step 3. Select if the schedule will be part of an existing vesting contract or if a new contract needs to be created.
If you're a first time user and just deployed a vesting contract = select No - Select an existing contract
If you're a returning user and creating schedules for new recipients = select No - Select an existing contract
If you're a returning user and creating additional schedules for existing recipients = select Yes - create a new contract
Choose to use an existing contract if every recipient wallet address is new to the contract. Remember, each vesting contract can't have duplicate wallet addresses!.
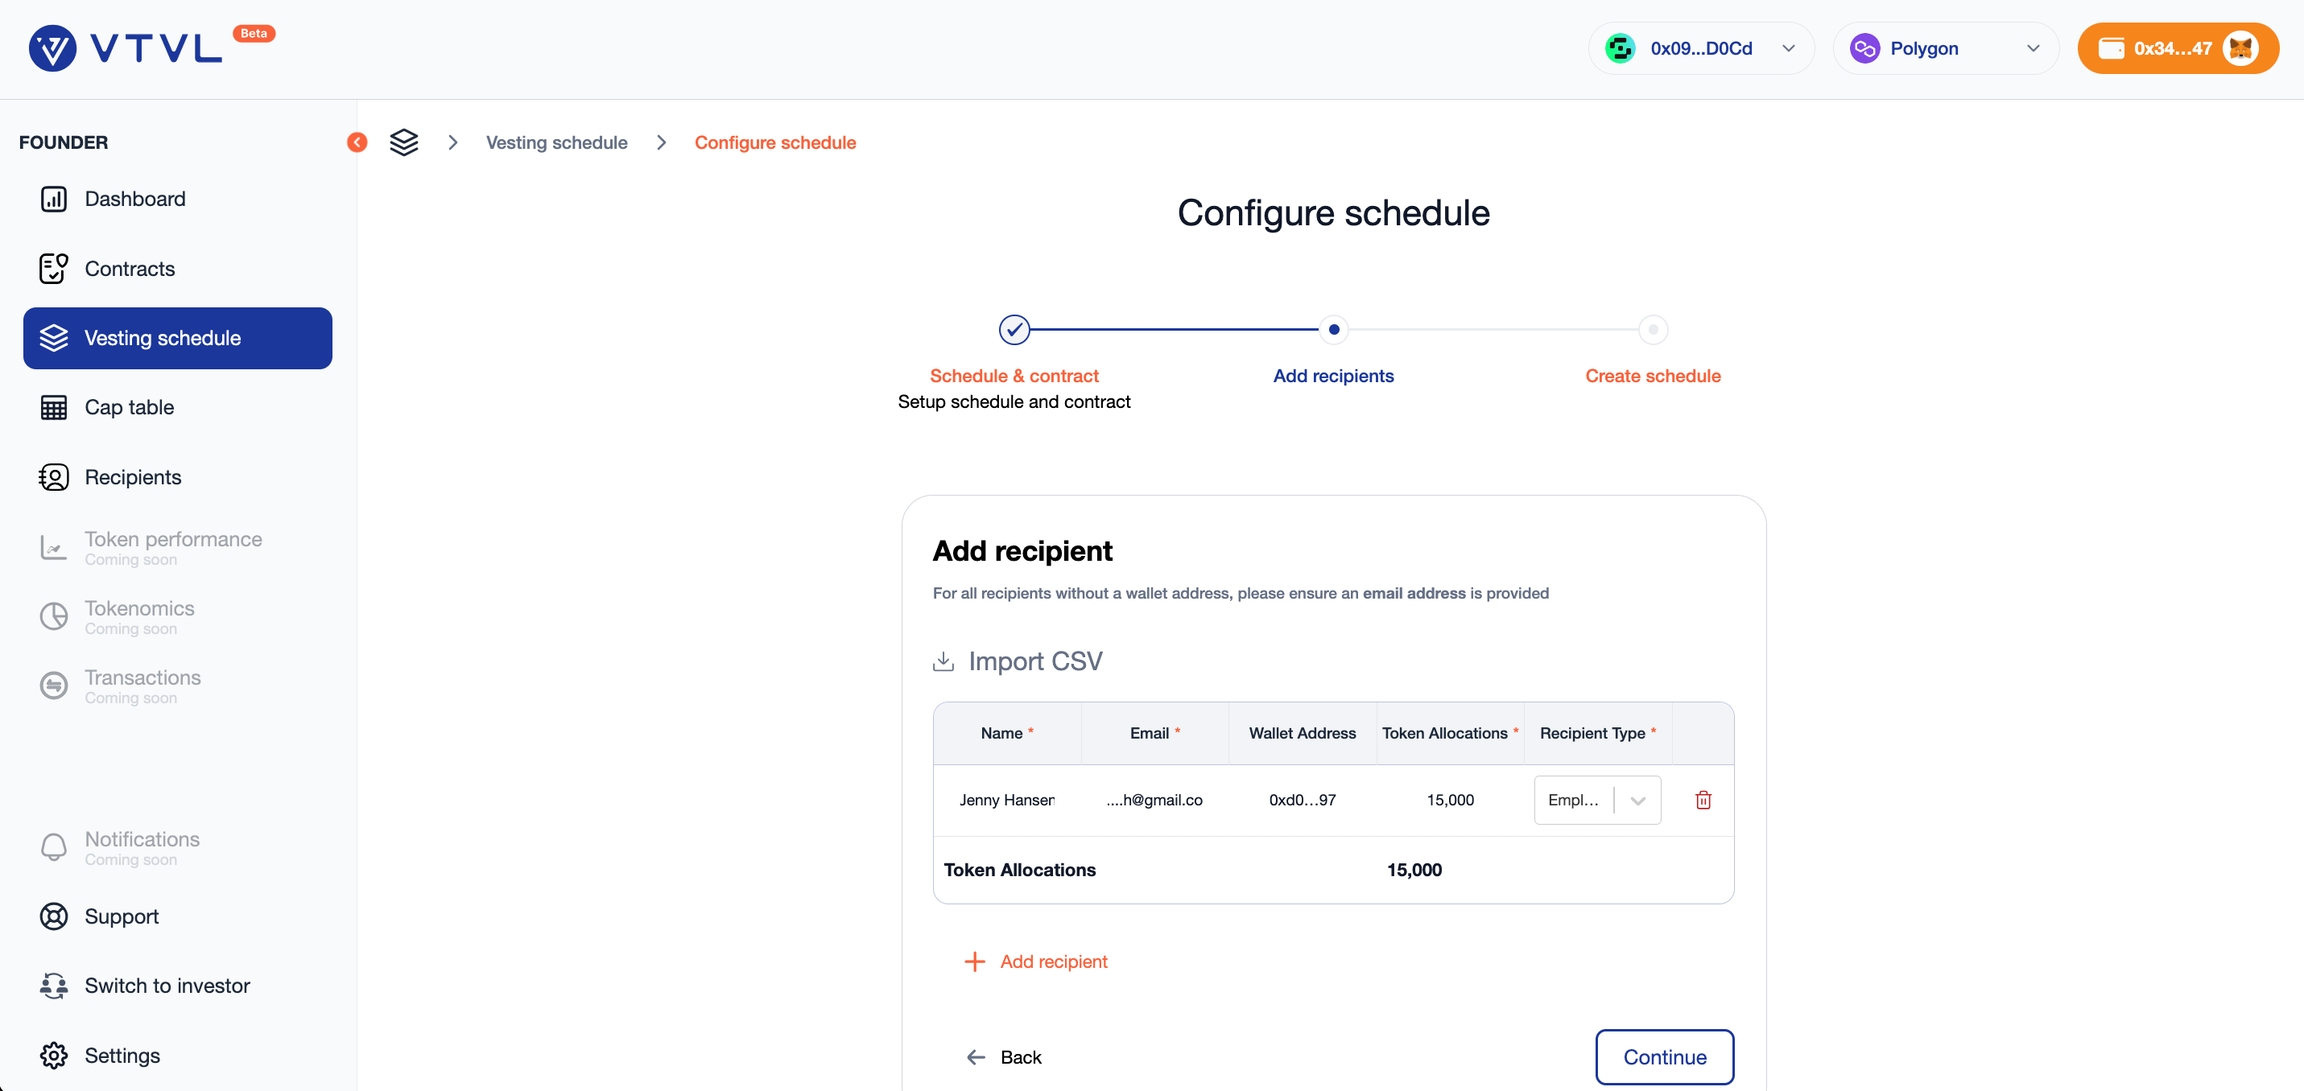
Step 4. Add the recipient(s) receiving tokens by clicking on + Add recipient then add these details:
recipient's name
email address
wallet address
number of tokens granted
recipient type from the drop down.
Select + Add recipient to add more recipients!
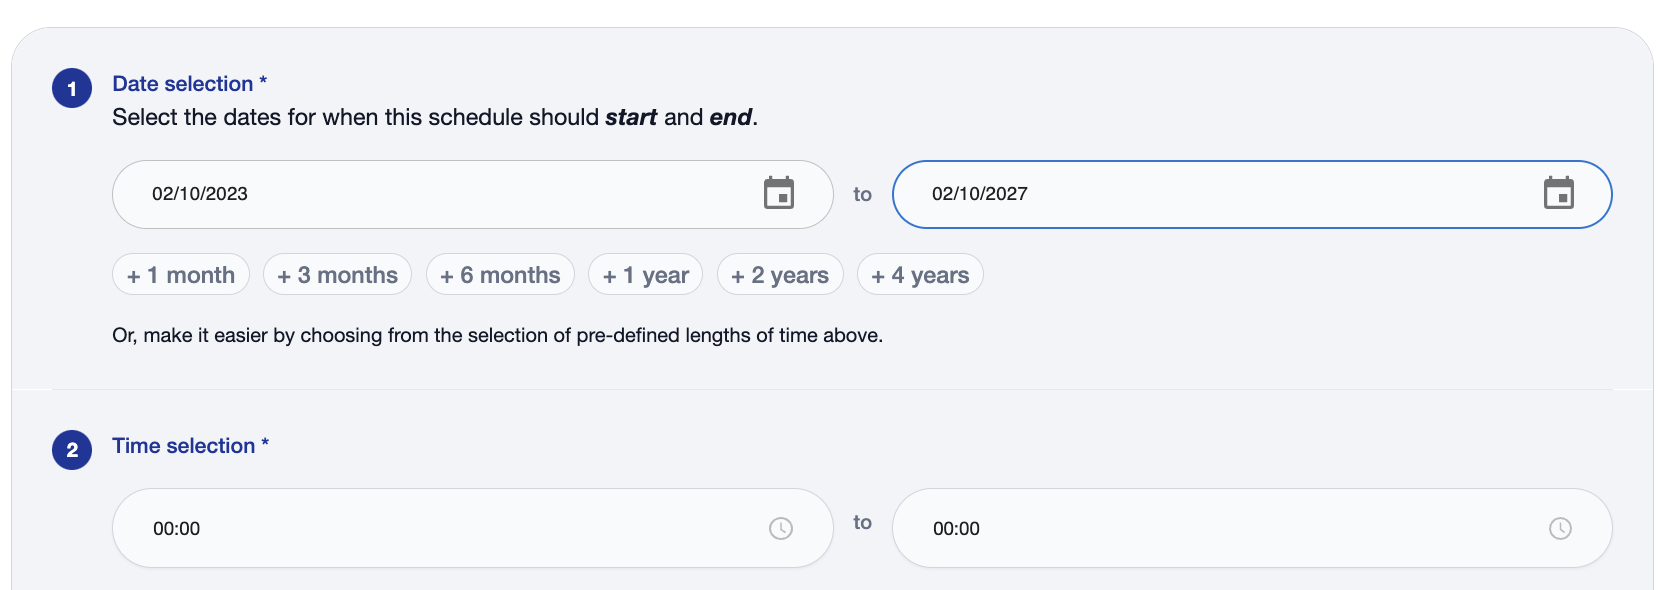
Step 5. Now configure the parameters of the vesting schedule and add the start date and end date. You can add the start date then click on any of the preconfigured duration chips below which will automatically calculate and populate the end date.
If needed, you can specify the start time and end time of the schedule. Times are based on your local time zone. Otherwise, keep it to 00:00.
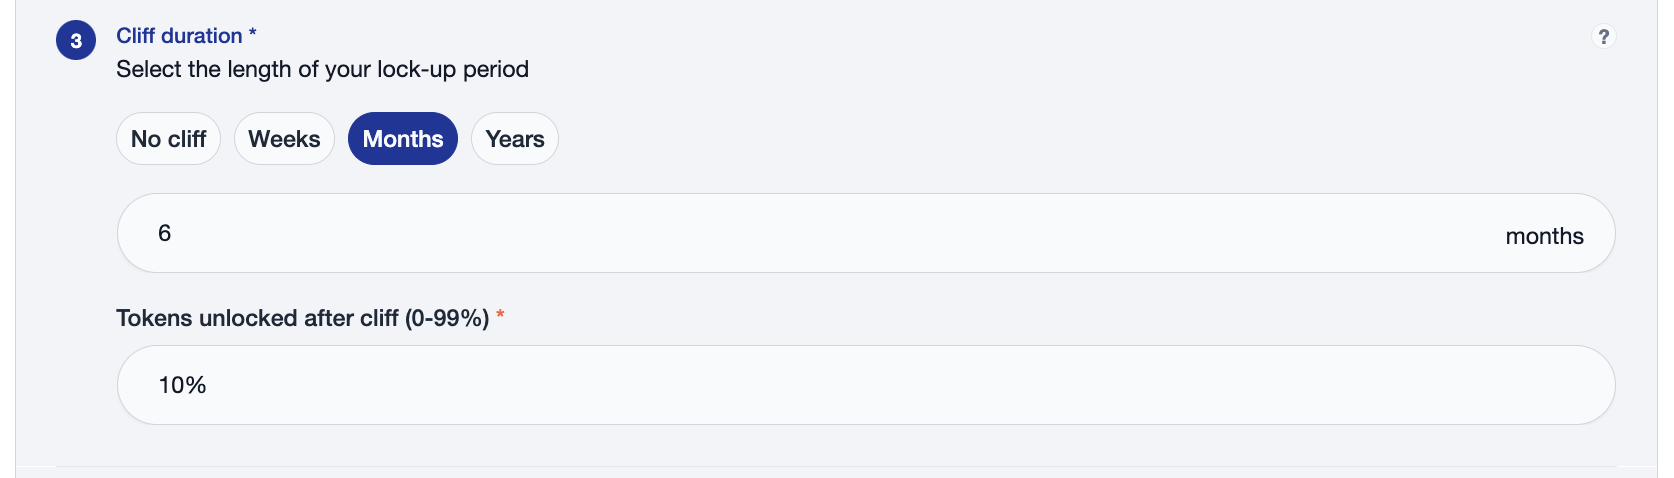
Step 6. Select the cliff duration by clicking on the appropriate chip. If you select Weeks, Months, or Years, two additional fields will be displayed for you to indicate the number of weeks, months, or years and the amount of tokens (if any) that will be released after the cliff.
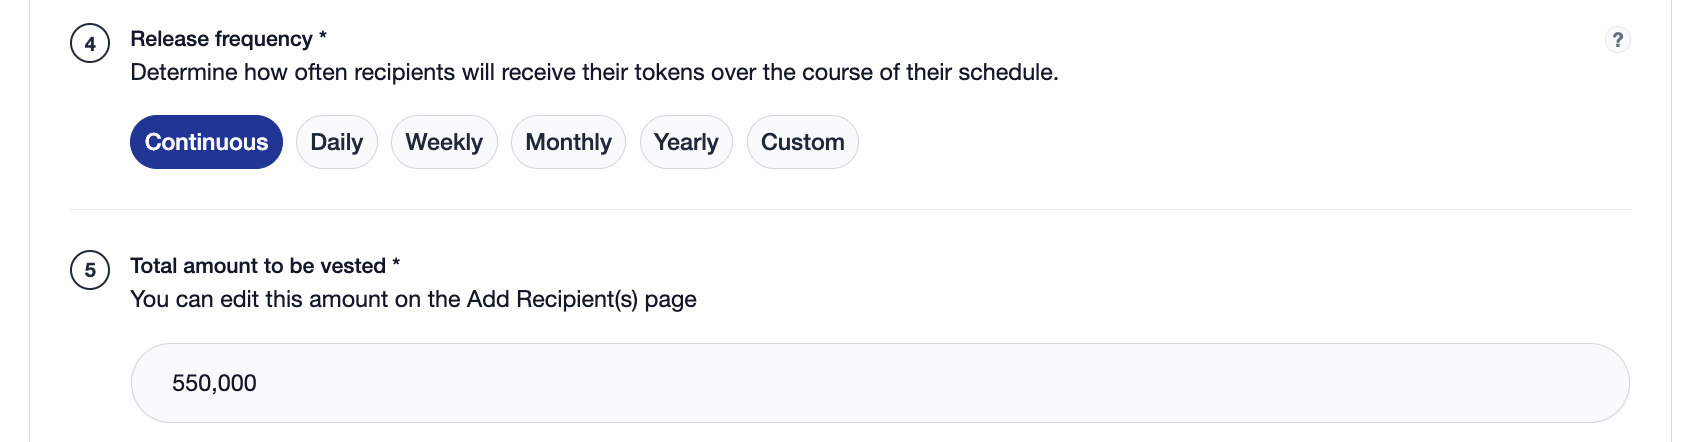
Step 7. Select the release frequency.
Release frequency definitions:
The total number of tokens to be vested for the schedule is automatically calculated and displayed in Step 5.
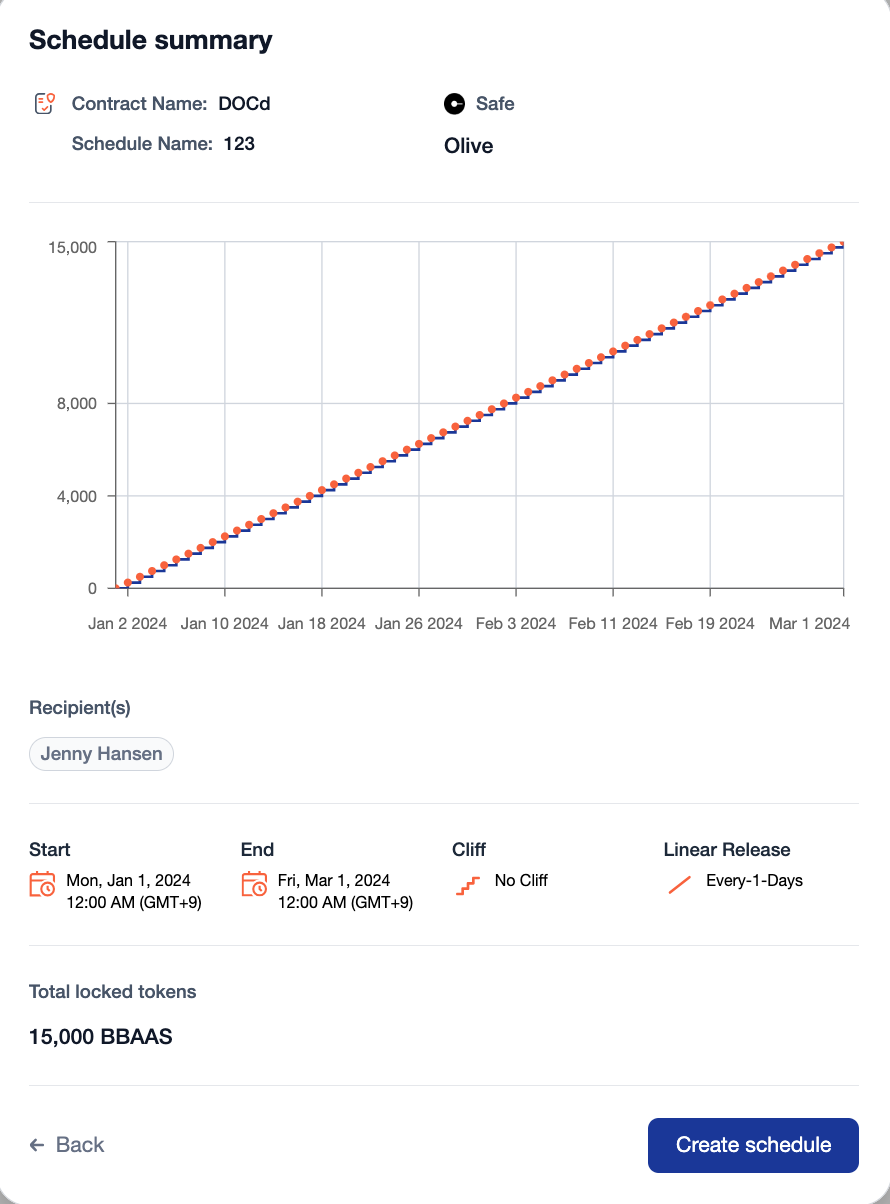
Step 8. Review your schedule summary and confirm everything looks correct. Go back to make any edits as necessary. Once you're ready, click Create schedule.
Step 9. If you'll be using the same parameters for other recipients in the future, then save this schedule by naming the schedule in the top right under Vesting template.
Saving your schedules is handy for recipients like employees who you'll create vesting schedules as they on-board to your company.
Now, let's deploy these schedules!
Last updated