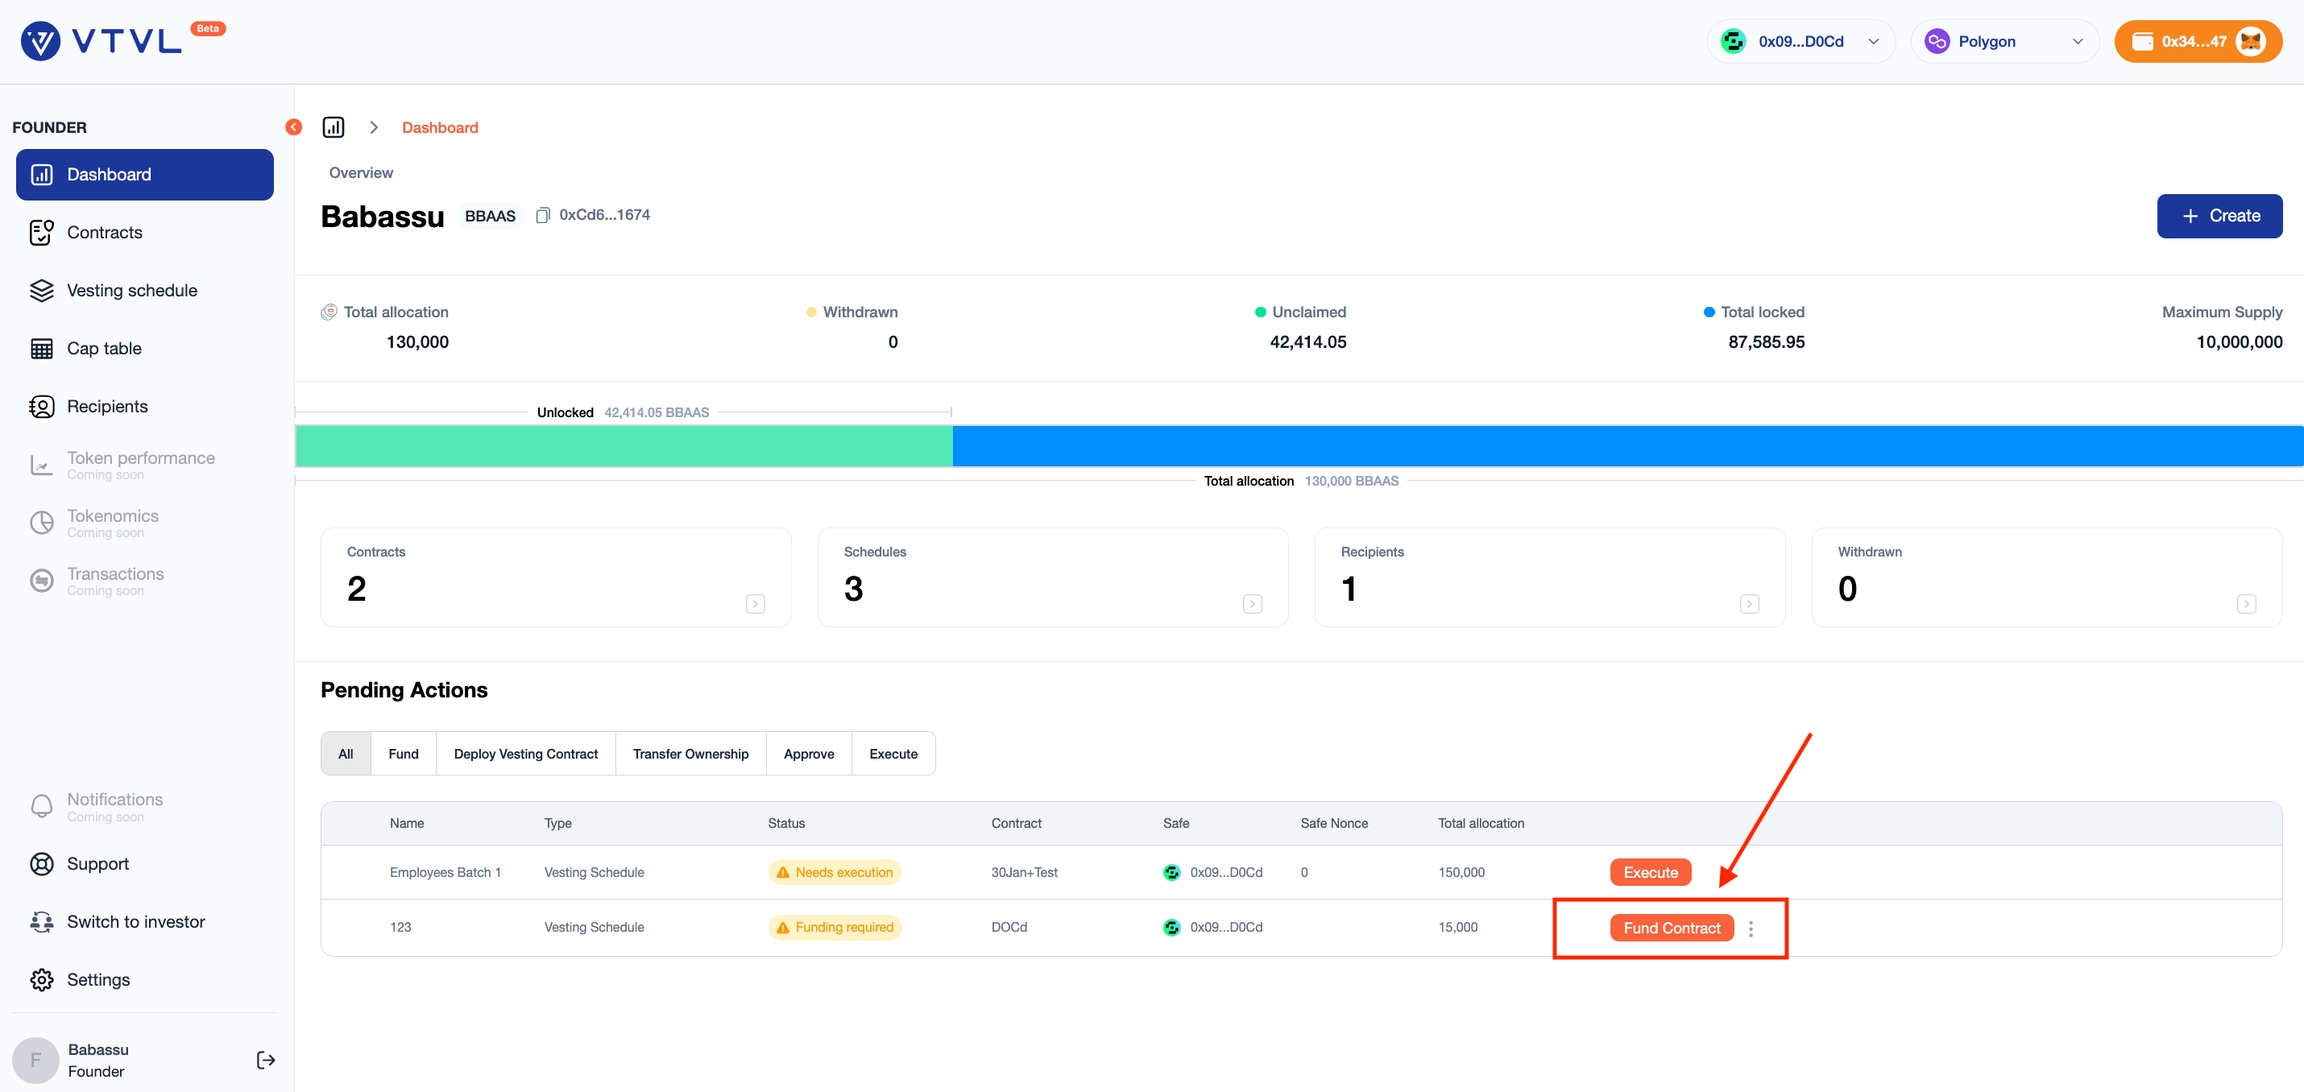
Fund your contract
Now that you've configured the parameters of your schedule(s), the next step is to transfer the tokens into the vesting contract.
💰 Think of this as adding money (tokens) into your bank account (contract) before you can set up your direct debits (schedules).
Step 1. Go back to your dashboard and click on the Fund Contract button next to the schedule you just created.
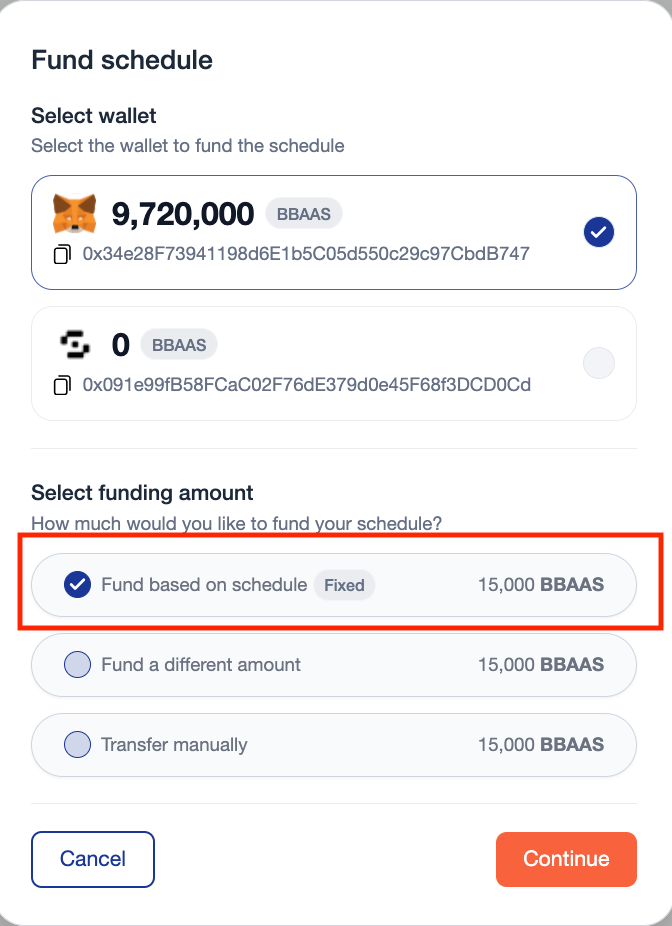
Step 2. On the pop-up, select the source of funding for your tokens. If it's located in the wallet that's connected to VTVL, it should automatically detect it (see screenshot).
Then, select the appropriate funding amount. Here's what the different options mean:
| Funding option | Definition |
|---|---|
Fund based on schedule (most common ✨) | Funds the exact amount that's needed |
Fund a different amount | Ability to specify the amount needed. Can be used to transfer more tokens than needed to avoid having to keep transferring for future deployments. |
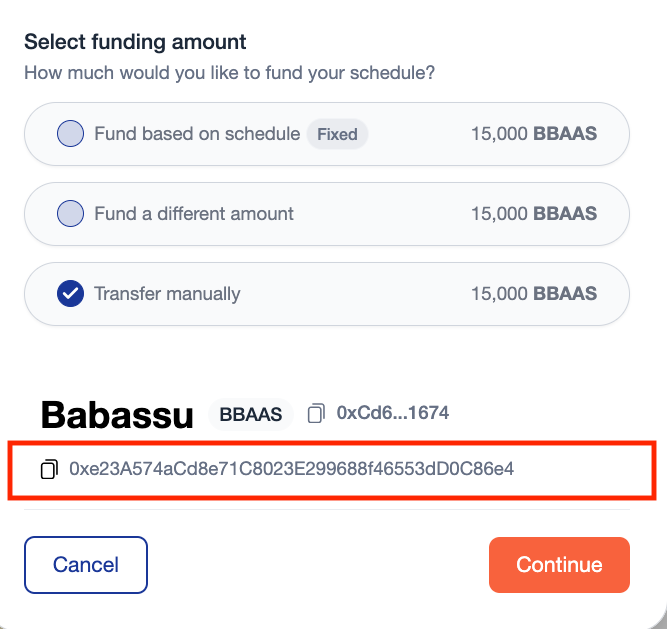
Transfer manually* | Used when transferring from a cold wallet / external custodian or if you're just keen to do it manually! |
*Make sure to copy the contract address and not the token address.
Step 3. Click Continue and proceed to approve the transaction on your wallet.
If you're using Metamask, note that there are two wallet pop-ups to approve. The first one to approve the spending cap and the second to approve the transfer. Be mindful of a slight delay in between pop-ups!
🎉 Bravo, your contract is now funded! Time to get these schedules deployed.
Last updated